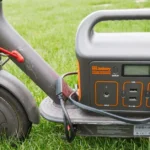
Gotrax scooter is one of the most popular brands of e-scooters. Despite its popularity, the scooters of this brand often show many problems. One of the problems users face is that their Gotrax scooter is thoroughly charged, but refuses to respond when tried to turn on.
In this guide, I will provide an in-depth troubleshooting guide for the Gotrax scooter which is charged but doesn’t move. Make sure that the battery is working alright before proceeding. Through this guide, you will be able to DIY inspect and repair your scooter.
Check out this All-Rounder Scooter as a Replacement!
EMOVE Cruiser S Electric scooter

Value For Money, Affordable, Convenient & Very Customizable. Long Range & Security Concerned!
33 mph Top Speed, 62-mile Range, 56 lbs, max load 352 lbs, IPX6 Water rating, Foldable, Hybrid Hydraulic brakes, tubeless tires, LCD Display, Key Start ignition, Turn signals, Custom Throttles, Plug-and-Play cabling, 9-12 hours Charge Time.
Use Coupon Code “SCOOTERINSIGHTS” for Free DISCOUNT !!
Table of Contents
- 1 Section 1: Power Button and Safety Features
- 2 Section 2: Kick-Start and Acceleration
- 3 Section 3: Additional Troubleshooting Steps
- 4 Section 4: Throttle Examination and Replacement
- 5 Section 5: Controller Examination and Replacement
- 5.1 1. Preliminary Checks
- 5.2 2. Multimeter Continuity Check
- 5.3 3. Controller Replacement
- 5.4 4. Specific Consideration for Certain Models (e.g., Apex)
- 5.5 5. Final Checks
- 5.6 Section 6: Motor Examination and Replacement
- 5.7 1. Motor Inspection
- 5.8 2. Identify Motor Location:
- 5.9 3. Connect Directly To DC Source
- 5.10 4. Motor Replacement
- 6 Conclusion
- 7 Frequently Asked Questions (FAQs)
Section 1: Power Button and Safety Features
1. Power Button Issues
Verify that you are pressing the power button correctly. It’s worth noting that some scooters have varying power button functionalities. While some respond instantly, others might require holding the button for a few seconds to power on.
2. Safety Features
Confirming that the kickstand is up is not just a safety measure; it’s an integral part of the scooter’s intelligent design. By preventing activation while the kickstand is down, potential accidents and damage are significantly reduced.
3. Brake Lever Sensor:
The engagement of the brake lever as a safety feature is more intricate than it seems. It not only prevents starting when the brakes are applied but also plays a crucial role in energy regeneration systems in some models.
Section 2: Kick-Start and Acceleration
The kick-start requirement is more than just a technicality. It’s a design choice that influences the overall user experience. Understanding why Gotrax scooters need to be kick-started for acceleration, pushing them to 3mph before engaging the throttle, provides insight into the scooter’s power delivery mechanism.
Section 3: Additional Troubleshooting Steps
1. Front Wheel Cable Check
The front wheel cable is not just a conduit for electrical signals; it plays a vital role in maintaining the scooter’s structural integrity. Checking its connection involves not only tightening screws but also understanding its impact on the scooter’s overall stability and safety during operation.
2. Cleaning Damaged Pins
The inspection of battery pack and handlebar pins for damage or corrosion is not merely a routine maintenance step. It’s a critical aspect of ensuring the scooter’s long-term reliability. Understanding the potential consequences of neglecting these connections empowers users to prioritize preventive measures.
3. Cleaning Procedure:
The meticulous cleaning of pins with a cloth, cotton swab, or isopropyl alcohol goes beyond aesthetics. It’s a proactive step in mitigating potential electrical issues. Users benefit from understanding the importance of maintaining these connections to prevent disruptions in scooter performance.
Section 4: Throttle Examination and Replacement
1. Throttle Inspection
Opening the throttle controller might seem technical, but it’s an insightful endeavor. Users gain a deeper understanding of the scooter’s inner workings, fostering a sense of ownership and the ability to identify potential issues before they escalate.
2. Hall Sensor Alignment:
Delving into hall sensor alignment provides users with a firsthand look at a crucial component. Understanding how the black hall sensor aligns with the magnet not only aids in troubleshooting but also offers a glimpse into the precision engineering that goes into creating a responsive and efficient throttle system.
3. Multimeter Check:
The multimeter check after throttle reassembly is not just a validation step; it’s a practical demonstration of how user input translates into electrical signals that drive the scooter. Users grasp the correlation between their actions and the scooter’s response, enhancing their overall understanding.
4. Throttle Replacement
Deciding when to replace the throttle set is more than addressing persistent issues. It involves recognizing the signs of wear and tear, and empowering users to proactively maintain their scooters for optimal performance. Users benefit from understanding the life cycle of critical components and planning for replacements accordingly.
Section 5: Controller Examination and Replacement
1. Preliminary Checks
The emphasis on safety precautions during preliminary checks is not merely a formality. It’s a reminder of the potential electrical hazards and the importance of approaching scooter maintenance with a safety-first mindset. Users are encouraged to prioritize their well-being while engaging in troubleshooting activities.
2. Multimeter Continuity Check
The utilization of a multimeter for continuity checks extends beyond identifying faults. It’s a hands-on lesson in electrical diagnostics. Users, by actively engaging with the multimeter, develop a foundational understanding of how electrical circuits function, setting the stage for more informed troubleshooting endeavors.
3. Controller Replacement
Locating the controller is not just about physical positioning; it’s about understanding the controller’s pivotal role in governing the scooter’s operations. Users gain insights into how a centralized control unit manages various components, fostering a comprehensive understanding of their scooter’s architecture.
Disconnecting Components:
- The careful disconnection of wires and cables is not a mere procedural step; it’s an exercise in precision and attention to detail. Users, by acknowledging the intricacies of component disconnection, develop a meticulous approach to maintenance, reducing the likelihood of errors during the replacement process.
Removal of Existing Controller:
- Unscrewing or detaching the existing controller involves more than mechanical actions. It signifies the removal of the brain of the scooter. Users, by recognizing this symbolic transition, develop a deeper appreciation for the interconnectedness of scooter components.
Placement of New Controller:
- The installation of a new controller is not just a replacement; it’s a rejuvenation of the scooter’s central nervous system. Users witness firsthand the impact of this upgrade on the scooter’s responsiveness and overall performance, reinforcing the importance of timely replacements.
Reconnecting Wires and Cables:
- The reconnection of wires and cables is not a mere technicality; it’s the re-establishment of communication pathways. Users, by visualizing the network of interconnected components, gain a holistic understanding of how information flows within the scooter.
Assembling the Scooter:
- Putting back the stem or deck cover involves more than aesthetics. It’s the final step in a meticulous process that users actively participated in. The satisfaction derived from assembling the scooter reinforces a sense of accomplishment and ownership.
4. Specific Consideration for Certain Models (e.g., Apex)
The mention of specific models requiring additional steps, such as removing the rear wheel, is not a generic warning but a reminder of the diverse engineering approaches adopted by different scooter manufacturers. Users are encouraged to delve into their scooter’s manual, fostering an appreciation for the uniqueness of their model.
5. Final Checks
The thorough inspection post-replacement is not a routine gesture; it’s a validation of the user’s efforts. Users, by meticulously checking for loose connections and ensuring component security, actively contribute to the scooter’s reliability and longevity.
Section 6: Motor Examination and Replacement
1. Motor Inspection
The emphasis on safety during motor inspection is not a redundant reminder. It’s a call to action, prompting users to prioritize their well-being during hands-on activities. Users are encouraged to approach motor inspection with caution, recognizing potential hazards.
2. Identify Motor Location:
Locating and removing the motor cover involves more than visual identification. It’s an exploration into the heart of the scooter’s propulsion system. Users gain insights into the compact yet powerful nature of electric scooter motors, fostering a sense of appreciation for the technology at play.
3. Connect Directly To DC Source
Connecting the motor directly to a D source is a straightforward way to check its functionalty. If the motor doesn’t respond, replace it.
4. Motor Replacement
Select Replacement:
- The selection of a compatible replacement motor is not just a transaction; it’s a strategic decision. Users, by understanding the specifications and compatibility requirements, actively contribute to the scooter’s performance enhancement. This step reinforces the user’s role in shaping their scooter’s capabilities.
Installation Steps:
- The installation of the new motor involves more than mechanical proficiency. It’s a testament to the user’s evolving expertise in scooter maintenance. Users, by seamlessly integrating the new motor into the scooter’s framework, gain a tangible sense of their role in preserving the scooter’s functionality.
Conclusion
In navigating the intricate landscape of Gotrax scooter troubleshooting, this in-depth guide serves as a beacon for users encountering the frustrating scenario of a fully charged yet unresponsive scooter. By meticulously dissecting each component and presenting actionable steps, users can not only diagnose but also actively participate in the restoration of their scooter’s functionality.
Remember, this guide is not just about fixing issues; it’s a journey of empowerment, fostering a deeper connection between users and their electric steeds. As you embark on the path of DIY inspection and repair, may the insights gained contribute to a seamless and informed electric scooter ownership experience.
Frequently Asked Questions (FAQs)
-
Why does my Gotrax scooter need to be kick-started for acceleration?
The kick-start requirement is a deliberate design choice to enhance user experience and initiate the scooter’s power delivery mechanism effectively.
-
What is the significance of the brake lever sensor in my Gotrax scooter?
The brake lever sensor serves a dual purpose by preventing starting when brakes are applied and playing a crucial role in energy regeneration systems in certain models.
-
How does cleaning damaged pins contribute to my scooter’s reliability?
Cleaning damaged pins ensures optimal electrical connections, reducing the risk of disruptions and enhancing the long-term reliability of your Gotrax scooter.
-
Why is the multimeter check after throttle reassembly crucial?
The multimeter check is a practical demonstration of how user input translates into electrical signals, providing insights into the correlation between actions and scooter response, ultimately enriching user understanding.
I’m Arsalan Ahmed, a passionate electric scooter enthusiast and the voice behind this blog. I’m here to share my expertise and insights with you. From in-depth reviews to problem-solving guides, my goal is to help you make the most of your electric scooter experience.


