Written by Ken Marshall
 Audited by Admin
🔍 84+ Products Analyzed
★ 28k Reviews Evaluated

I will endeavor to troubleshoot issues when the Razor scooter is not working correctly. I will personally guide you through every major and minor issue, and any underlying causes that may contribute to the scooter not functioning as intended.
I will discuss the issues and systematically troubleshoot various components one by one, prioritizing the most likely causes.
Check out this All-Rounder Scooter as a Replacement!
Coupon Code Discount !
EMOVE Cruiser S Electric scooter
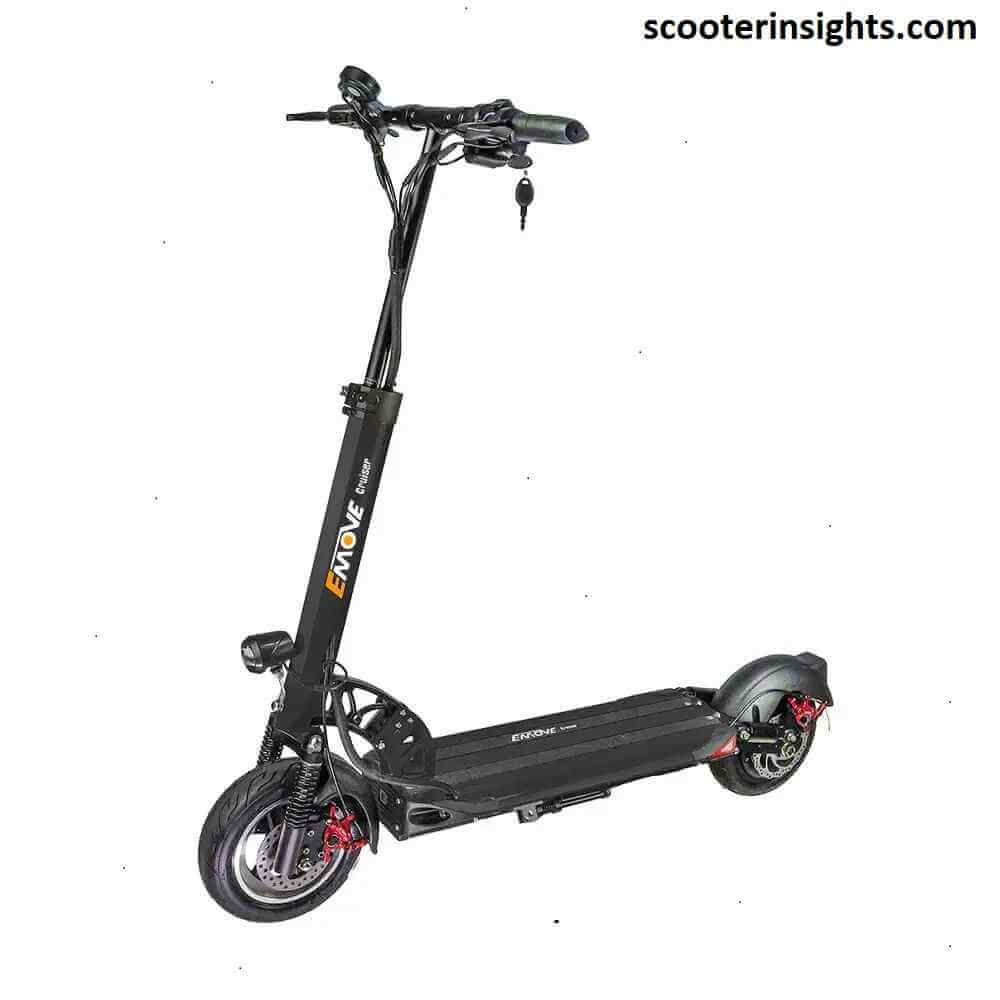
Value For Money, Affordable, Convenient & Very Customizable. Long Range & Security Concerned!
33 mph Top Speed, 62-mile Range, 56 lbs, max load 352 lbs, IPX6 Water rating, Foldable, Hybrid Hydraulic brakes, tubeless tires, LCD Display, Key Start ignition, Turn signals, Custom Throttles, Plug-and-Play cabling, 9-12 hours Charge Time.
Use Coupon Code "Flat45" for Free DISCOUNT !!
Fixing Razor Scooter Not Working Step by Step
I will discuss every cause and issue in the order of most possibility. I will discuss the things which are more likeable to cause issues first and others afterwards. In this way, I will provide troubleshooting and solutions to each of the possible issue and causes.
A. Kick-Start the Scooter
Razor E90 and E1XX series scooters require a kick start. If your scooter is fully charged but fails to move, it's possible that you've overlooked the kick-start feature. It's a common oversight, leaving many puzzled as to why their scooter isn't in motion.
To engage the motor, you must manually push the scooter to reach a speed of 3mph.
Notably, Razor E200 and E300 models do not necessitate a kick start.
B. Troubleshooting Razor Charging Problems
When your Razor cooter encounters charging issues, it typically falls into one of three scenarios: Red Light, Flickering Red and Green Lights, or Green Light But Not Charging. Here are step-by-step troubleshooting solutions:
Troubleshooting Steps
1. Reset the Scooter
Hold the reset button for 5 seconds, located on the deck beside the On/Off button.
2. Inspect the Fuses & Reset Button
Access the internal components by unscrewing the scooter deck. Verify the 20-amp reset button for continuity with a multimeter and replace it if necessary. Some models may have a 30-amp fuse.
3. Check Charger Port
Ensure the charger port's continuity by examining the two pins with a silver metal piece inside. The charger should output a voltage of approximately 26V.
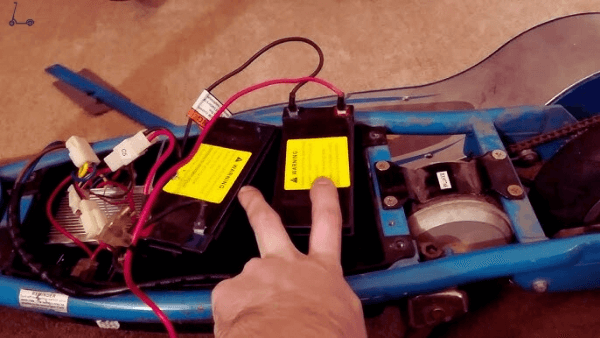
4. Troubleshoot Batteries
Use a multimeter to check the battery voltage. For lead-acid batteries, add distilled water for maintenance.
5. Replace the Batteries
If the previous solutions fail, consider replacing the batteries.
6. Replace the Controller
As a last resort, contemplate replacing the controller, although this is not a common issue. It's crucial to verify voltage supply problems first.
C. Inspecting the On/Off Switch
Occasionally, the On/Off switch may require replacement. Before moving on to other components, examine the On/Off switch.
The process is relatively simple. Open up the scooter, locate the switch inside, and connect its bottom two pins with a multimeter. There should be continuity when the switch is in the ON position.
D. Resetting the Scooter & Troubleshooting Reset Button Issues
Resetting the Razor e-scooter can often resolve performance issues.ÃÂÃÂÂ
How to Reset
The reset button is situated on either side of the deck, beside the On/Off button. Press and hold this button for 5 seconds. If the button is faulty, you'll need to reset it.
To troubleshoot the reset button, follow these steps:
Troubleshooting Steps & Solutions
Button Not Responding
- Ensure the scooter is powered on and the battery is charged.
- Check for physical obstructions around the reset button and clean it if necessary.
- Inspect the wiring and connections for any loose or damaged wires.
- Replace the reset button unit if needed.
Stuck or Jammed Button
- Examine the button for foreign objects, debris, or damage causing it to jam, and remove any obstructions.
- If the button is physically damaged, consider replacement.
Reset Not Effective
- Verify that you are following the correct reset procedure as per the user manual.
- Ensure secure and unobstructed connections between the controller and reset button.
- Replace the reset button if problems persist.
Replacing the Reset Button
| If you want to replace the reset button, check out these 7A, 20A and 30A reset buttons according to your Razor model
To replace the reset button, follow these steps:
- Remove Deck Screws
- Find Reset Button
- Remove Battery Bar
- Disconnect Wires
- Unscrew Button Unit
- Replace Reset Button
- Reconnect Wires
E. Confirming Brake's Connection
If the brake encounters any issues, the scooter won't move, primarily for safety reasons.
Check the Wire is connected Firmly
The wire coming from the brake on the front wheel is thin and has a small connector. It connects to the controller.
Checking Continuity in Brake Wire
Check for continuity in the brake wire using a multimeter. It should have continuity when the lever is not engaged. If it doesn't, ensure the wire connections of the brakes are intact.
If continuity persists when the brake lever is pressed, the brake lever is faulty and should be replaced.
Uncover the details Kingbull Bikes Discount Code.
F. Inspecting the Motor
The motor is a critical component that may fail in extreme conditions. If your Razor scooter is not working or moving, you should carefully test the motor.
How to Confirm Motor Issues
The motor issue can be confirmed by listening for a click sound from the relay (controller). If you hear this click but the motor doesn't work, you need to focus on the motor.
Controller Wire Connecting to Motors Wire
One yellow and one blue wire are connected and come out of the controller to connect with the motor wires. Ensure there is continuity in these wires, especially when the throttle is engaged. If the wires do not show continuity, replace the controller.
Checking Resistance of Motor Wires:
Use a multimeter to check the resistance of the wire coming out of the motor. It's a thick red and black wire. It should read around 5-7 ohms. If it reads significantly less or more than this, the motor is likely burned or damaged, or the wires may be faulty.
If your Razor scooter fails to respond when you twist or press the throttle, continue reading for troubleshooting steps.
Checking for Continuity in Throttle Wires Connecting to Controller
Two orange and two brown wires connect to the controller. Use a multimeter to check for continuity in these wires when the throttle is applied. There should be continuity. If there isn't, the throttle is likely faulty.
Replacing the Throttle
To replace the throttle, follow these steps:
- Take Out the Grips
- Pull the grip out of the handlebar.
- Unscrew the Throttle
- Unscrew the thumb throttle (or the twist-grip throttle in some models).
- Replace the Throttle
- Remount and reconnect it to the scooter.
H. Inspecting & Troubleshooting the Controller
If the battery, motor, and throttle are all functioning correctly, and resetting the scooter doesn't resolve the issue, the controller should be the focus of your attention. I think it is generally the most durable component of the scooter and should be examined last.
The controller unit is located just beside the batteries in the deck. In the E90 and E1XX series, it is a black box, but in E200 and E300, its a little bit different and is covered with gray cover.
Testing & Troubleshooting Steps
Here are troubleshooting and testing steps:
- The controller box is located beside the battery, with red and black wires from each battery connecting directly to it.
- Check for continuity in the wires connecting to the controller.
- If there is no continuity in these connecting wires, recheck the batteries and replace the wires coming out of the battery, and inspect battery connections.
- Check for continuity in the wires coming out of the controller. If there is no continuity, replace the controller.
If the current is arriving at the controller but not leaving it, especially when the throttle is engaged, you should replace the controller box. Replacement controllers can be found online, and the replacement process is straightforward.
Where to Find Replacement Parts
Fortunately, you can find replacement parts for the Razor scooter online easily.
Also, replacing them and fitting them also do not require any technician or mechanic skills.
Conclusion
In conclusion, troubleshooting the Razor scooter involves a systematic examination of potential issues affecting its performance. From addressing a non-operational motor to scrutinizing minor concerns like brake malfunctions, I've provided a comprehensive guide.
By prioritizing components and detailing troubleshooting steps, users can identify and resolve issues, with replacement parts readily available online and an easy fitting process. This guide empowers users to maintain their Razor scooter confidently, ensuring optimal performance.
See Also Razor e-Scooter Not Charging [Fixing Common Issues]
ABOUT THE AUTHOR

Ken Marshall
Author
Ken “Magma” Marshall is currently the CSO and a Partner at RevenueZen, with 4 exits under his belt. He’s been obsessing over helping brands grow through sustainable SEO & content strategies for the last 8 years. Husband, coffee addict, recovering foodie, BJJ bro, and mini Australian shepherd puppy dad. Helping folks build their dreams is my passion.