Written by Ken Marshall
 Audited by Admin
🔍 64+ Products Analyzed
★ 14k Reviews Evaluated
In this guide, I'll address common Razor E-series (E90, E100, E125, E150, E175, E200, E300) (including core and glow versions) reset button (also known as circuit breaker) issues, providing solutions for problems like unresponsiveness, jammed buttons, and ineffective resets.
I'll also walk you through the process of replacing the reset button, inspecting connections to the reset button, additional resetting tips and alternative methods for resetting your scooter.
Note: I have put extensive research to conclude that every E-series scooter of the Razor has similar construction, connections and reset button units working in the same mechanism. So the guide can be equally helpful for any E-series model.
Common Razor E-series Reset Button Problems
1. Button Not Responding
Issue: The reset button does not respond when pressed.
Troubleshooting Steps
- First, ensure that the scooter is powered on and the battery is charged. A low battery can affect button responsiveness.
- Check for any physical obstructions on or around the reset button. Debris or dirt can impede its functionality. Clean the button gently if needed.
- Inspect the wiring and connections to the reset button. Loose or damaged wires can lead to unresponsiveness.
- Replace reset button unit.
See AlsoÃÂÂ Razor e-Scooter Not Charging [Fixing Common Issues]
2. Stuck or Jammed Button
Issue: The reset button is physically stuck or jammed, preventing it from being pressed or released properly.
Troubleshooting Steps
- Carefully inspect the button for any foreign objects, debris, or damage that might be causing it to jam. Remove any obstructions.
- If the button is physically damaged, it may require replacement.
3. Reset Not Effective
Issue: Even when the reset button is pressed, it may not effectively reset the scooter, and the issue that prompted the reset may persist.
Troubleshooting Steps
- Verify that you are following the correct procedure for using the reset button, as outlined in the user manual.
- Ensure that the connections with controller and reset button are secure and good, and signals pass through without any hindrance.
- Replace reset button
How to Check if Reset Button is Working?
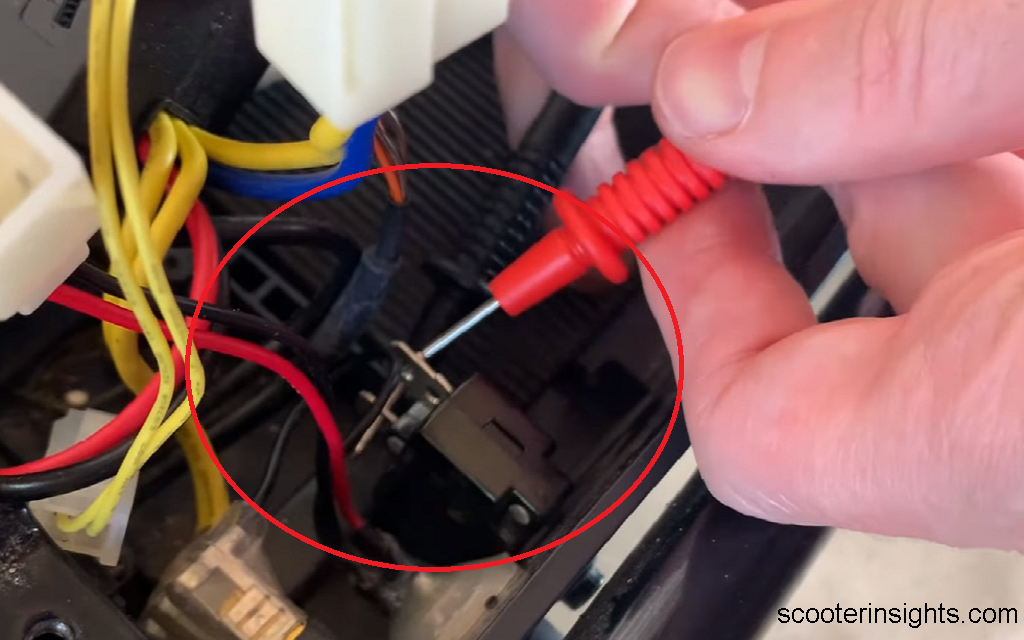
The functionality of the reset button whether it is correctly working or not, can be easily determined using a multimeter.
Unscrew the Deck Board
Start by unscrewing the deck and getting access to the the reset button from the inside. It will have two pins on the inside.
Check Continuity in the Pins
Connect the two pins of multimeter to the two pins of the reset button from the inside. Check for continuity in the reset button.
Testing Continuity (Beeps) and Deducing Conclusion
If you hear a beep, the reset button is functional. If you hear a beep again from the multimeter, i.e continuity is detected when you press the reset button, it means that the reset button is working.
If either of these beeps don't occur, i.e continuity, the button unit is defective and needs replacement.
Replacing the Razor E-series Reset Button
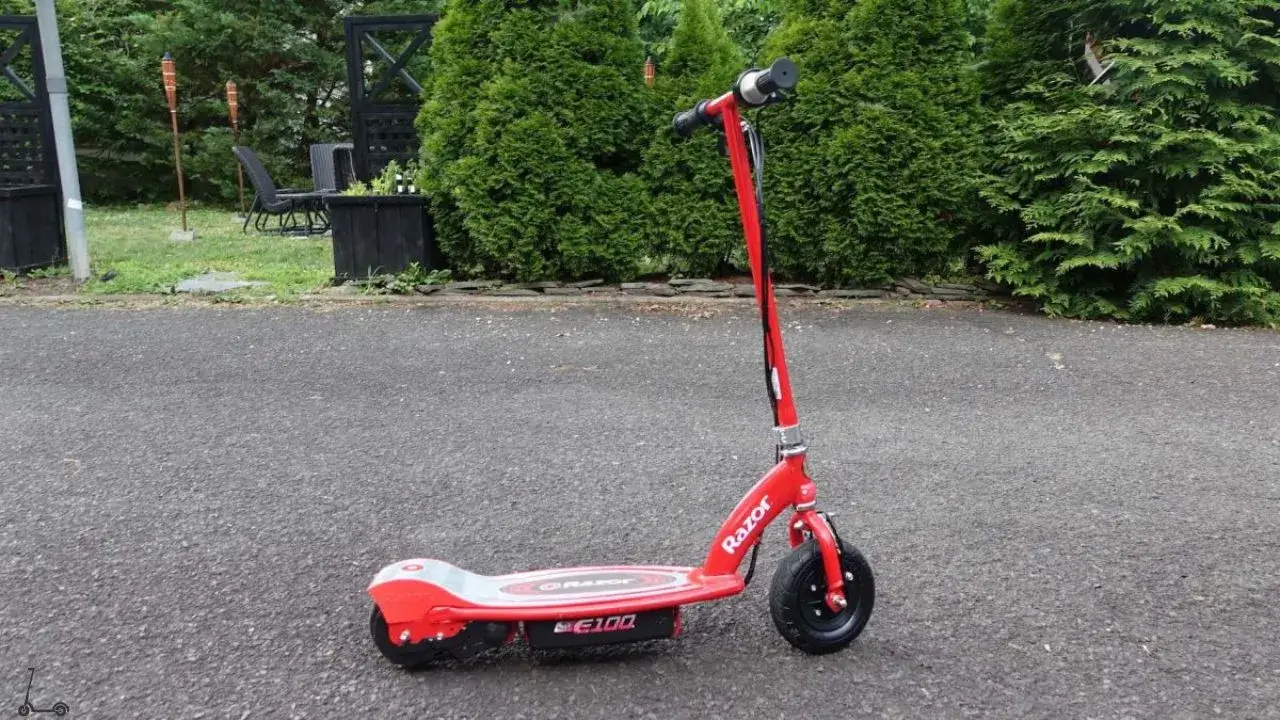
In case you don't know where is the reset button located, it is on the side of footdeck, beside the On/Off switch, attached with the battery compartment internally.
Over time, this button can wear out and may require replacement. Here's a step-by-step guide to replacing the reset button on your Razor scooter.

Note: This procedure is generally applicable to all Razor E90, E1XX, E200, E300 scooter models, including Core and Glow variants, as they typically use the same reset button.
| Read More : Where is the reset button located on my e-scooter?
Tools Needed
- Screwdriver
- Replacement reset button (can be easily purchased online)

Procedure
Certainly, here are the step-by-step instructions with numbered headings for replacing the reset button on a Razor E-series electric scooter
1. Safety First
Ensure the scooter is powered off, and the battery is disconnected to prevent any electrical accidents.
Start here Pedal Electric Coupons, Troxus Mobility Discount Code, and NIU Deals.
2. Access the Reset Button
Unscrew the 6 screws on the scooter deck using a screwdriver. This will allow you to access the internal components of the scooter.
3. Locate the Reset Button
The reset button is usually situated on the deck inside the battery compartment.
4. Remove Battery Bar
To gain access to the reset button, remove the 2 screws securing the battery bar. This will allow you to lift the batteries out of the way.
5. Disconnect Wires
Carefully disconnect the red and black wires that are connected to the reset button. These wires provide power to the button and are essential for its function.
6. Unscrew the Button Unit
From the outside of the deck, unscrew the reset button unit. This will allow you to remove it from the inside.
7. Replace the Reset Button
Install the new reset button in place of the old one. Ensure it is securely fastened.
8. Reconnect Wires
Reconnect the red and black wires to the new reset button. Make sure they are firmly attached.
9. Reassemble
Place the batteries back into their compartment and secure the battery bar with the 2 screws.
10. Secure the Deck
Screw the 6 screws back into the deck to secure it in place.
11. Test the Reset Function
Reconnect the scooter's battery and power it on. Press the reset button to ensure it functions correctly. If the power switch lights up, its a good signal.
By following these steps, you can replace the reset button on your Razor E-scooter, restoring its safety and functionality. Remember that you can easily find replacement reset buttons online, making the process of obtaining the necessary parts straightforward.
Inspecting Connections Related to the Reset Button
Here's how to ensure that the connections are secure and functioning correctly:
1. Ensure Proper Signal Flow
- Before replacing the reset button, verify that the connections with the controller and reset button are secure and unobstructed.
- Open the battery compartment like done in replacing the battery step, the red and black wires will be connected to the reset button.
- Inspect the wiring and connectors for any signs of damage or loose connections.
2. Controller and Reset Button Wiring
- Pay close attention to the wiring between the controller and the reset button. The controller is just beside the batteries, and near the reset button.
- Ensure that all wires are securely connected to their respective terminals.
- If you notice any loose or damaged wires, repair or replace them as needed.
3. Test for Signal Continuity
- To ensure proper signal flow, you can use a multimeter to test the continuity of the wires connected to the reset button.
- Set the multimeter to the continuity or resistance setting and touch the probes to the ends of each wire. A continuous beep or a low resistance reading indicates that the wire is functioning correctly.
4. Battery Connection
- Check if the battery is providing consistent 24V voltage.
- While inspecting connections, also check the battery connections. Ensure that the battery is securely connected to the scooter's wiring.
- Loose or corroded battery connections can lead to power issues that affect the reset button's functionality. Use vinegar to treat corrosion.
5. Reassemble and Test:
- After confirming that all connections are secure and in good condition, reassemble the scooter by following the steps outlined earlier for replacing the reset button.
Additional Troubleshooting Tips
Battery Status
Always check the battery status of your Razor E-series. A low or depleted battery can lead to various issues, including problems with the reset button. Charge the battery fully and test the scooter again.
Also Read: Impact of battery health on scooter performance
User Manual Reference
Refer to the user manual that came with your Razor scooter for detailed instructions on using the reset button and troubleshooting common issues.
Contact Razor Customer Support
If the problems persist and your scooter is still under warranty, consider reaching out to Razor's customer support for more specialized assistance.
Replacement Parts
If you determine that the reset button itself is faulty, you can order a replacement button or seek professional repair services. Ensure that you choose the correct replacement part for your scooter's model.
Explore Reset Alternatives
Depending on the issue you're trying to resolve, there may be alternative ways to achieve the desired result without using the reset button. Consult the user manual or search online for potential workarounds or solutions.
Alternative ways to Reset
Though not as effective as a reset button, these methods can also act as reset functions and might solve minor issues.
A. Disconnect and Reconnect the Battery
- Turn off the scooter by ensuring it's not powered.
- Locate the battery compartment, typically under the scooter deck.
- Disconnect the battery connector by unplugging it.
- Wait for a few minutes, then reconnect the battery.
- Power on the scooter and check if the issue has been resolved.
B. Power Cycle Using the Power Switch
- Some Razor scooters have a power switch separate from the reset button.
- Turn off the scooter using the power switch.
- Wait for a minute or two to ensure all residual power is drained.
- Turn the power switch back on and see if the problem is resolved.
C. Check for a Manual Reset Procedure
Review your Razor E100's user manual for any alternative reset procedures provided by the manufacturer. The scooter might have manual reset options using throttle, brake lever and start button.
Some scooters may have specific key combinations or button sequences that can be used as an alternative reset method.
Read More : How to reset an electric scooter
Conclusion
In conclusion, resolving reset button problems for Razor E-series (E90, E100, E125, E150, E175, E200, E300) electric scooters demands a comprehensive approach. From basic troubleshooting to replacement of button, I have covered every topic.
Emphasizing safety, the step-by-step button replacement process is detailed. Inspection of connections, battery status checks, and alternative reset methods further enhance the troubleshooting arsenal.
This guide aims to empower users to maintain their Razor E-series scooters, fostering a seamless and enjoyable riding experience.
ABOUT THE AUTHOR

Ken Marshall
Author
Ken “Magma” Marshall is currently the CSO and a Partner at RevenueZen, with 4 exits under his belt. He’s been obsessing over helping brands grow through sustainable SEO & content strategies for the last 8 years. Husband, coffee addict, recovering foodie, BJJ bro, and mini Australian shepherd puppy dad. Helping folks build their dreams is my passion.